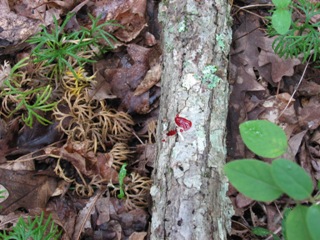
After Taking the Shot
Tracking an animal after you have taken the shot can be one of the most difficult tasks presented to any hunter. This brings up an important question.
How does an instructor teach the students about blood trailing and provide a meaningful tracking experience for the student?
You can set this up, with minimal costs, on any hunter safety trail, a grassy area or a wooded lot where the field day is conducted.

You will need the following items purchased at any Halloween costume store or any drug/food store to make fake blood:
- 1 package of fake blood purchased at Halloween costume store.
- 1 bottle of glycerin
- 1 bottle of red food coloring
- 1 spray bottle
- 1 bottle that will provide single drops when squeezed.
The purchased fake blood is thick and might need to be thinned out with some water.
You can make the consistency of the mixture either thin and runny or thick and sticky depending on what type of blood trail scenario you are creating.
You can vary the color from light red to dark red, depending on the shot placement scenario. Bright red for lung shots, or dark red for other shots.
Use the spray bottle to recreate lung shots. Stand on the path and spray the mixture 3 or 4 times at arms’ length on one side of path.
Squeeze drops from the dropper bottle to recreate a deer walking along leaving drops of blood as it moves down a path.
You can use the spray bottle and the dropper bottle together to make a blood trail for your students. Putting a decoy deer at the end of the blood trail makes it even more realistic for students.
This type of exercise will give the students the knowledge of blood trails, and makes the class fun and exciting. You could make a 2 or 3 trail scenarios, split the students up and let them explore and be detectives.
